Just completed the install; photos on my profile page.
The process is far from plug and play, but it's not too difficult if you follow the PROPER instructions. From a 1-10 level of difficulty, 10 being the toughest, this install is about a 6.5. And I'm no Rocket Scientist. Standard tools and patience will go far. A friend who's skilled in this type of thing--or better yet, done the install--will make the entire process go quickly (1 hour).
BTW, there's no way I could've figured this out without the help of our own Hellfire. You went above and beyond to help a fellow Rocket Rider out. Thanks, brother.
OK, here we go...(FOR THE ROCKET 3 TOURING ONLY). The instructions provided by the manufacturer are really intended for the Classic and Standard; the process is slightly but significantly different for the Touring (R3T).
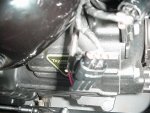
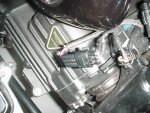
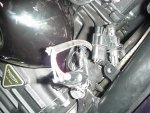
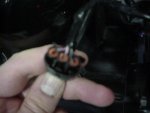
The main issue is the wiring coming from the Gear Position Sensor (GPS). On a R3T the coupler at the end will have 3 (three) wires on each end (3 male, 3 female). I understand that the Classic and Standard have only 2 on each end.
As well, the COLOR of the wires that need to be swapped out are different. On the Classic and Standard, the instructions appear correct (black/violet and black). On the R3T, the wires are PINK on the female end and BLACK/VIOLET on the male end. It's important to understand that there are (unfortunately) two identical black/violet wires, side by side. No worries, just ensure you swap the one OPPOSITE the larger PINK wire. On mine, it was the one on the left.
Other than that, the installation is the same as called for in the instructions provided.
I plan to write to the manufacturer as the Healtech-electronics folks should really have mentioned that small bit of information...
Well, it LOOKS good, anyhow.
I went thru the "learning procedure" as the gear sensor was "off" a bit and there's nothing left to do but get it on a long stretch of San Diego pavement!
I'll let you know what differences there are.

")